Thursday, March 30, 2006

Fifth Assignment: Portraits

It was time to get up close and personal this week where the class tried their hands at taking shots of human subjects. Here are the results!

Alice


Bob


John


Judy


Kate


Marshall


Mike


Niel P


Susan

Fourth Assignment: Landscapes

This week, the class went out to try their hands at capturing landscapes. Here are the tasty results!

Alice


John


Judy


Kate


Michelle


Mike


Niel


Niel P


Ruth

Thursday, March 02, 2006

Assignment See it from all Angles

This week I challenged the class to try to see their subjects from different angles to try to break them out of the normal photocomposition. I asked each student to use a non-living subject and to try to get a series of different perspectives. The results were that each student would bring out a different mood that you would not get from the subject if you were to just look at it normally. Here is the world of different angles from the class!

Alice- She used a colorful wood duck for her subject and I am showing her example of where she got down low and off to an angle.


Bob- He chose a stunning bouquet of flowers! Bob also edited this photo using Corel Draw to mask out the background which he felt was obstructive.


John- He went outside to the Grace Anglican Church and focused on the windows. This one is very captivating from his angle and gives the impression that the building is twice the size it normally is.


Judy- As you can see, Judy is a golf nut and illustrated that very well with the golf shoe she used. I like how Judy used a piece of red material which plays off the black and white of the shoe.


Kate- She got up on a chair and took a picture of the lovely flowers her husband gave her (way to go Mike!). I was happy with the results that Kate got from getting up higher and Kate was one of the few students who managed to get a proper “Birds Eye View” of her subject.


Marshal- He took different angles of this deer statue in his home. By just changing the way the camera is positioned, this picture already has a lot more interest then just looking at it head on.


Mike- He set up a nice arrangement of all things Tea! This is my favorite shot of the lot Mike sent in showing a shot from the back. I also love how Mike paid attention to his background and chose something that relates to the subject. Great composition, Mike!


Ruth- This is of a glass art globe in Ruth’s house where she experimented with different backgrounds while seeing it from every angle. Her experiment paid off with a dazzling effect on the background’s reflection in the glass.

Susan- She sells seashells by the seashore, and again, a great image of Susan’s shell collection. The patterns in the shell pop out with the blue background and having it off center works again for the composition.

Thursday, February 23, 2006

Assignment Rules of the Thirds

With the first Assignment, I asked the class to take the lesson they received on the Rules of the Thirds and to take three shots for next weeks class. Here are my pick of the best from each student (in no order).
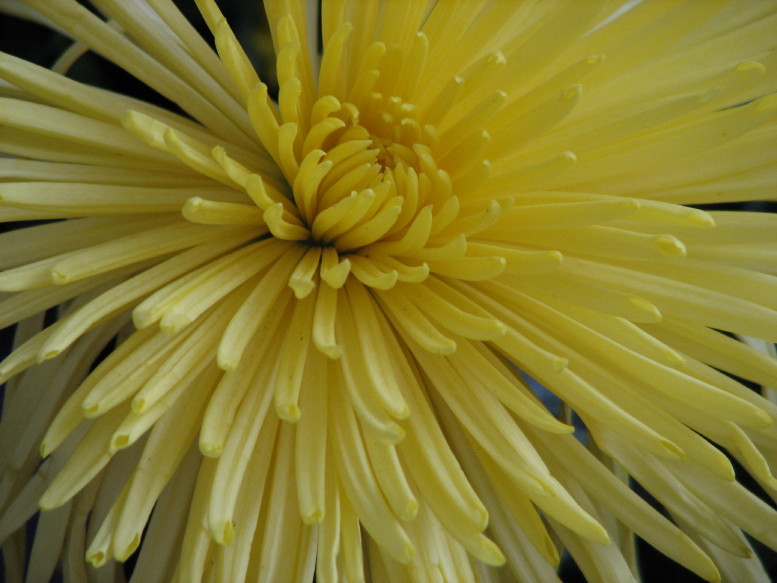
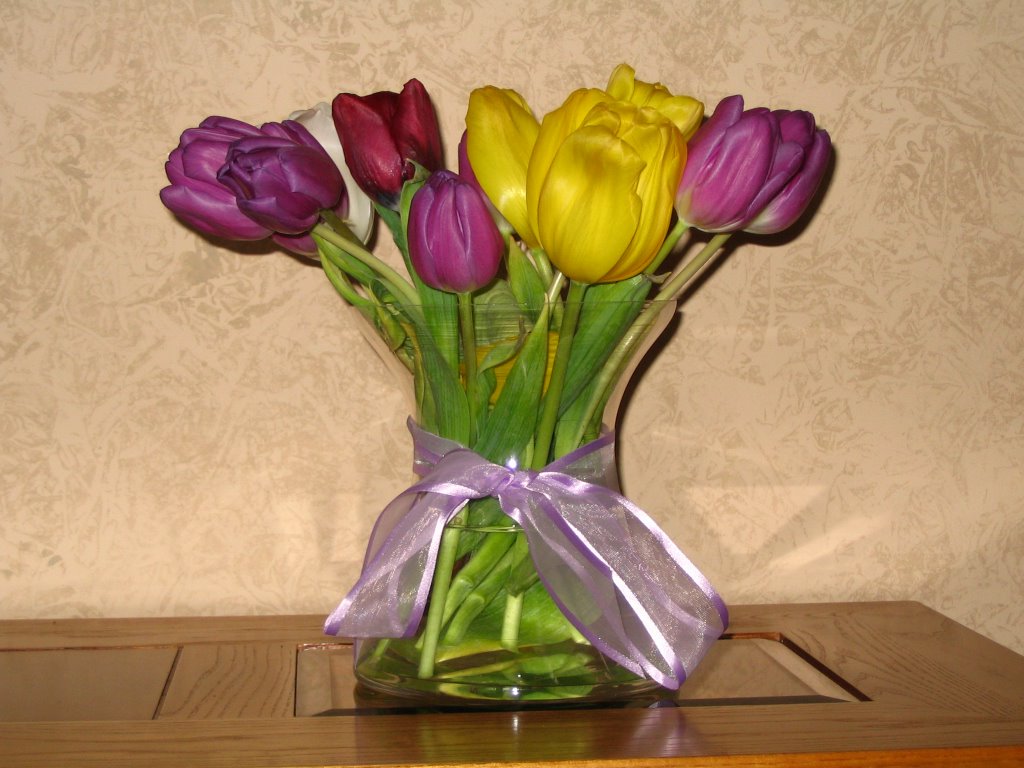
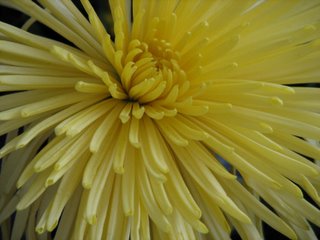

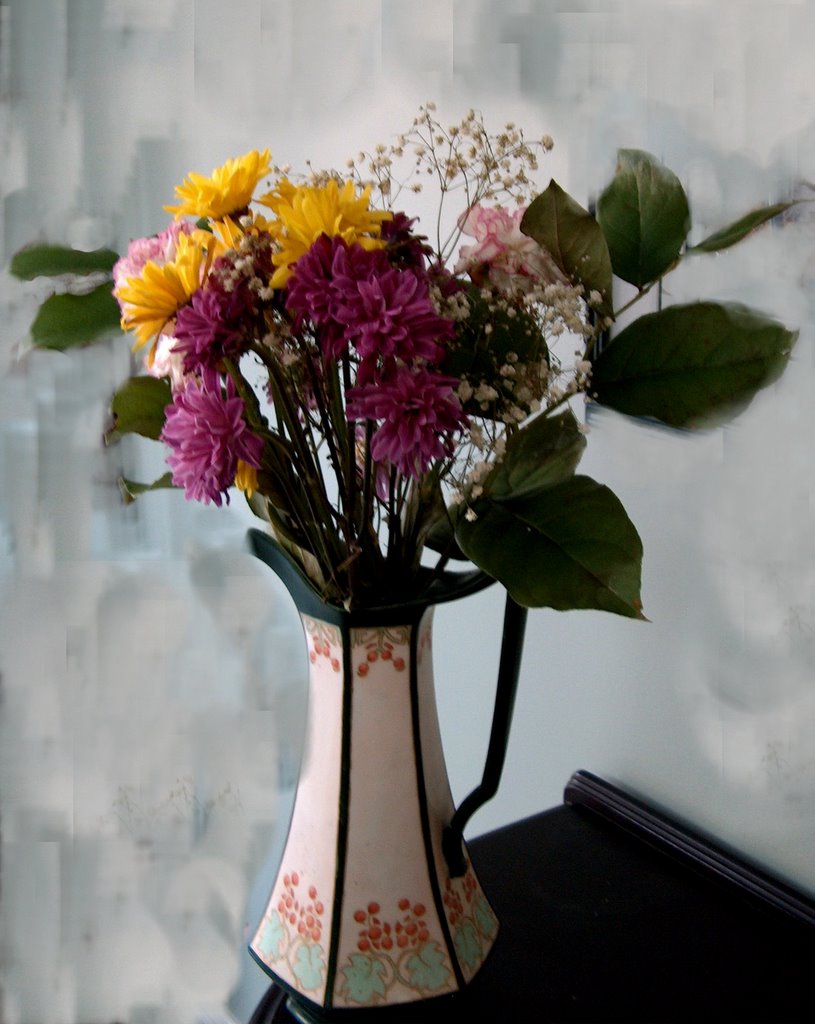
Alice chose to take photos of a flower arraignment she had on hand. I like the colour and the way she put the stem of the flower a bit off center which pulls your eyes. She did remember to first focus the stem by depressing her shutter halfway and then moved the camera to slightly put the stem off center.
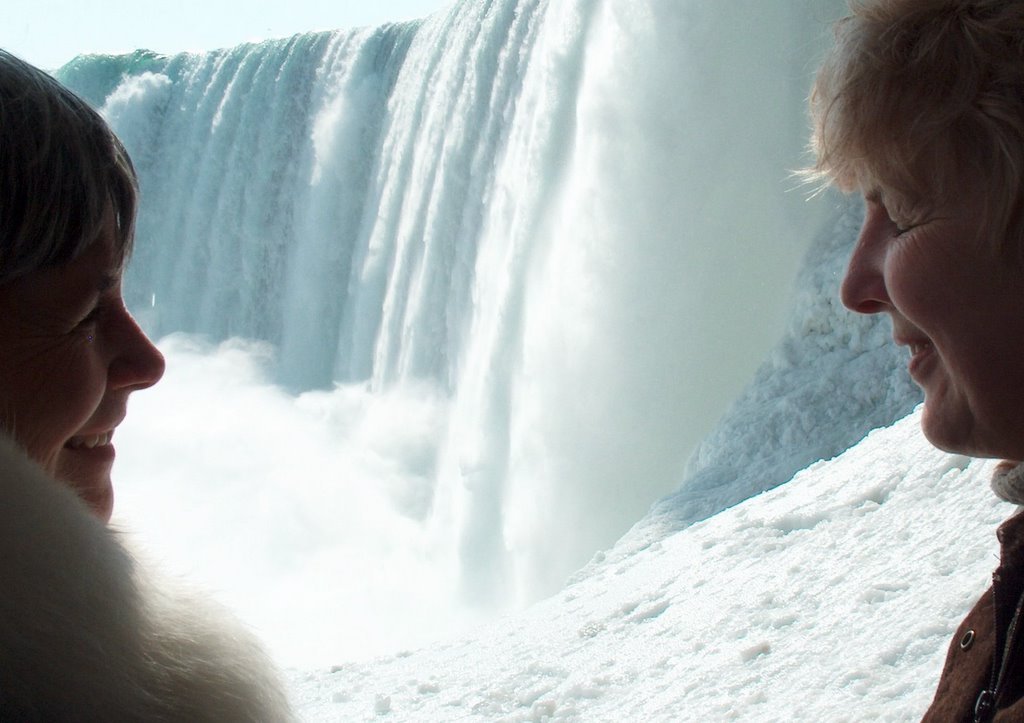
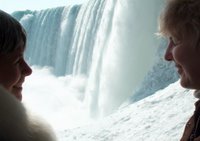

Bob went to Niagara Falls on the weekend and amazed the class with this shot of his two subjects in one of the tunnels that leads to the horseshoe falls. It was a great choice to frame the photo using the two people to call for a very interesting shot. We talked about how when you are out on family vacations and at place where you could set up a typical family shot to try new things to bring an element of excitement to your photos.
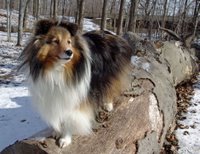

John took a walk to Mill Pond and set this shot up of his dog. This is a great photo that shows how when you use the rule of the thirds to set up your pictures you will always end up with great results. The dog's face is clear and in focus, slightly off center creating good flow with the background. John possibly worked with a good depth of field to get this shot and I think as it stands alone he doesn't need to crop out anything and can just frame this one and put it on the wall.


Judy also took a photo of a flower arrangement she had and decided to line up the grid with the top of the flowers so that the colours were not centered. With this shot, I would recommend that Judy crop out a lot of the empty space in her photo to pull more attention to the bulbs of the tulips.


Kate took a walk in Oakville by the lake and captured this shot of the pathway by the gazebo. The way she captured the shadow to enclose the photo is great and works well with the negative and positive space. I like this photo because nothing is very centered and because of that shadow that leaks onto the white area of snow.
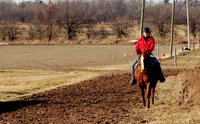

Marshall got this great shot of a horse rider in a field and put his subject off centered to grasp a bit of the background for the photo. I don't know if he knows, but the way the diagonal line of the field works perfect for this shot and it was a brilliant idea to line the diagonal in this way to divide the entire shot.
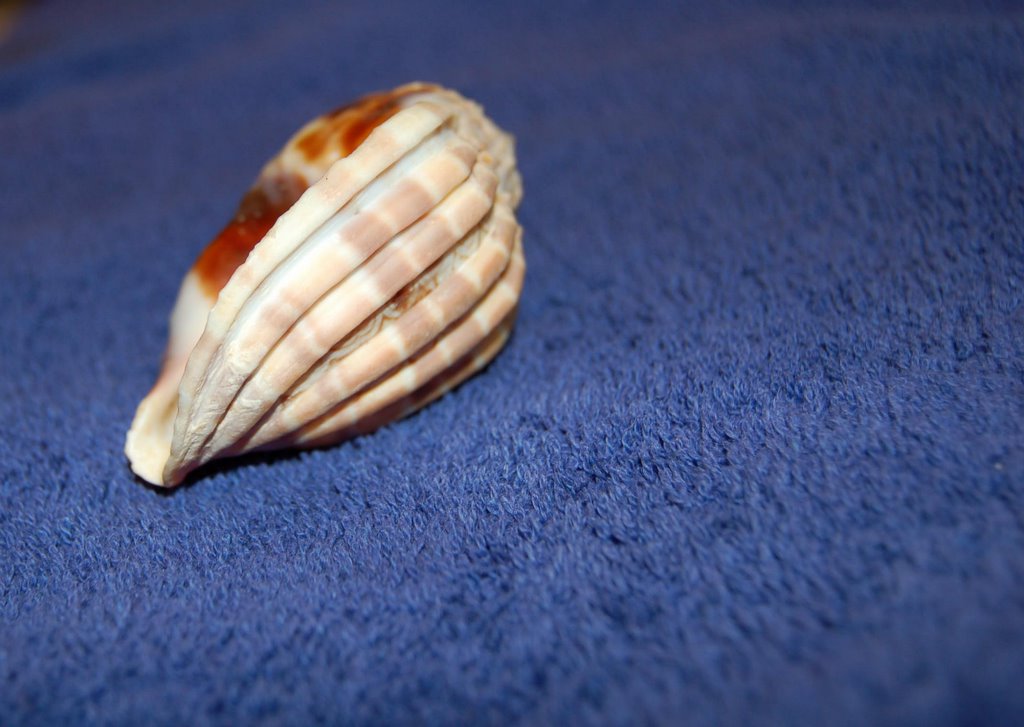
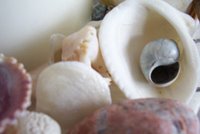


Meg captured a great shot of a collection of sea shells for this assignment. What works well is that little blob of black on one of the shells which is off center which demands you attention. The contrast of the one black shell to the rest of the white shells stands out and because it is off center it forces the viewer to explore the photo.
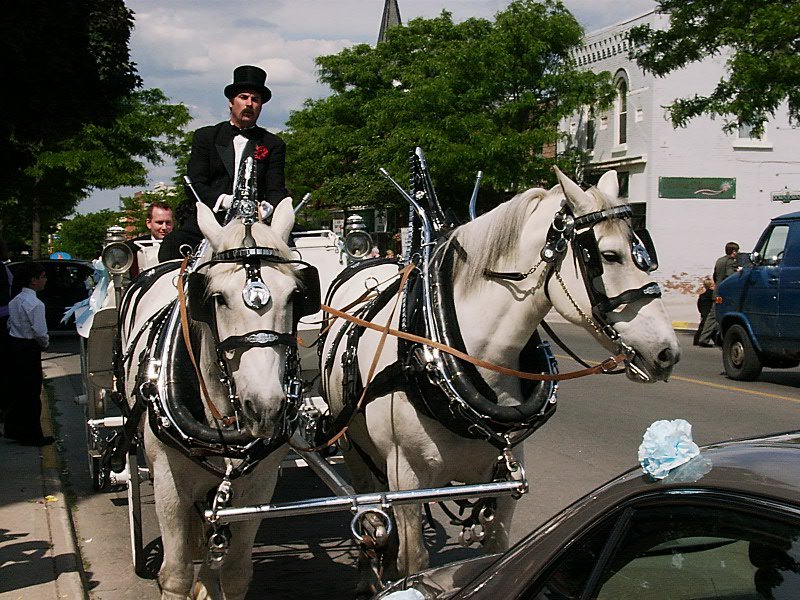
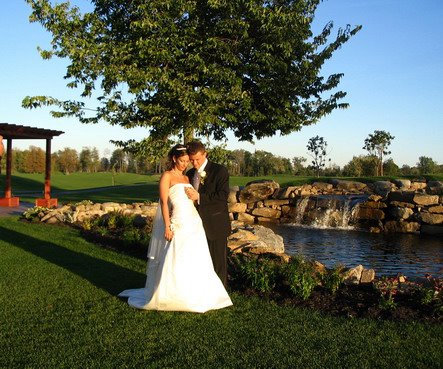
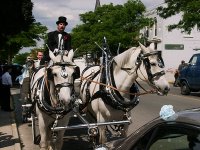

Michele was at a wedding when she took her shots. She managed to take this classic shot of the rider with the buggy as it was coming down the street. She managed to keep the driver off center to allow more room for the horses. The only drawback of the photo is the end of the car in the lower right corner. I would recommend that Michele crops out the car corner as close as she can to bring out her subject better.
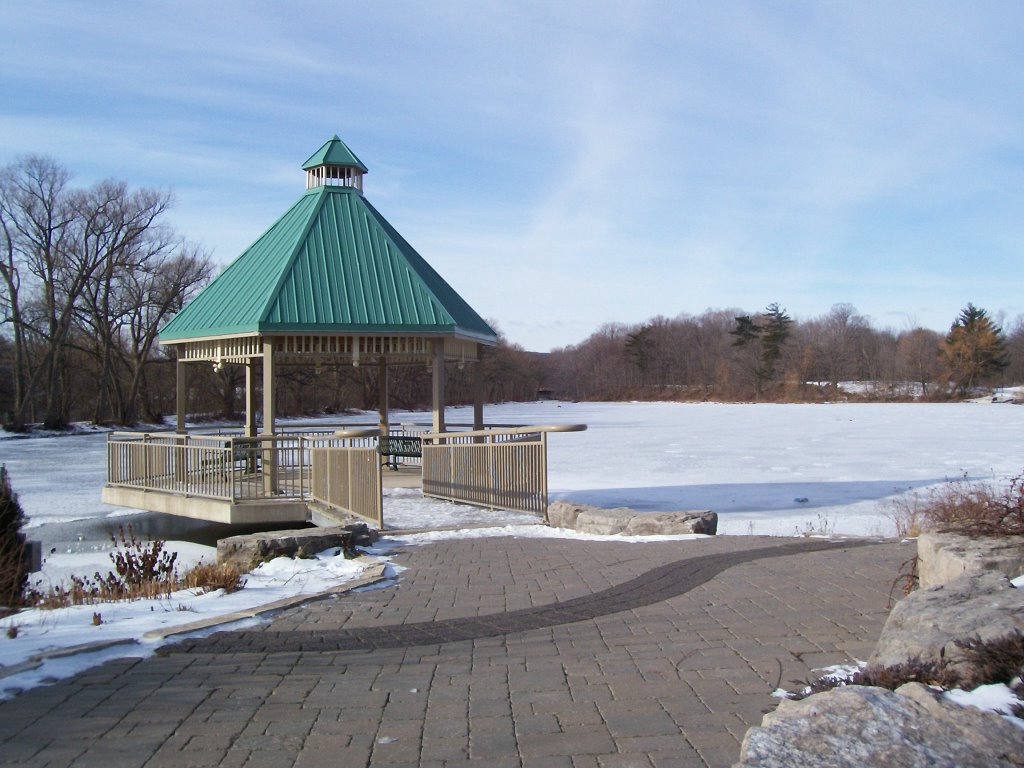

Mike had a very amusing story when he came to class with his photos. He told the class that when he was out taking photos for the assignment he discovered that Mill Pond had more then one path that lead behind it and he took his time discovering. With this shot, Mike put the gazebo off centered and allowed the pathway to fill the frame to lead the viewer to his subject.
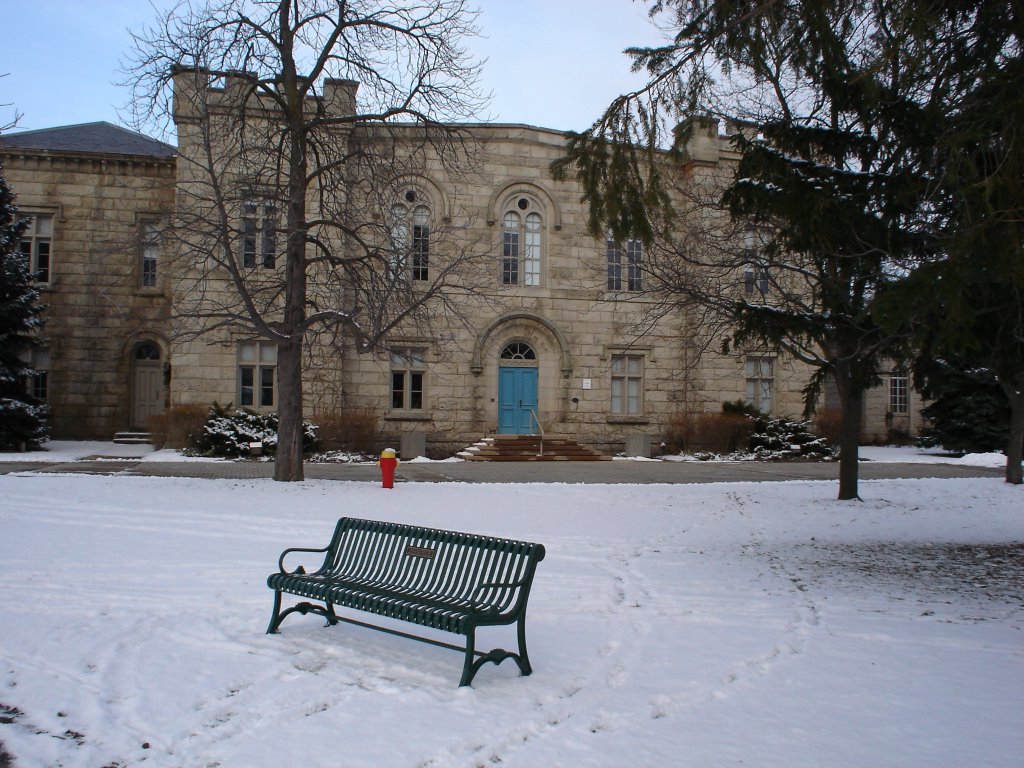
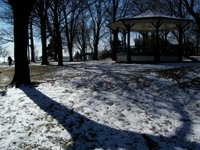
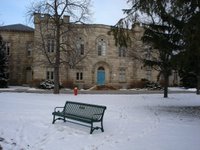


Neil P took this shot right outside the Town Hall in Victoria Park. At first he did not know if he wanted to make the bench the focal point of his photo and because of the way the footsteps worked around it, I asked him to crop the photo to make the bench his subject. I would probably ask him to crop this photo one more time before printing it to drop the bench closer towards the lower left corner.
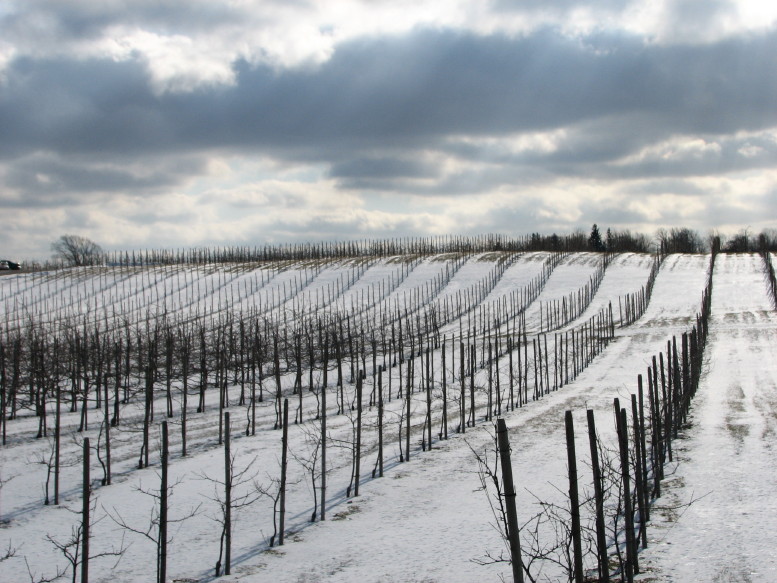
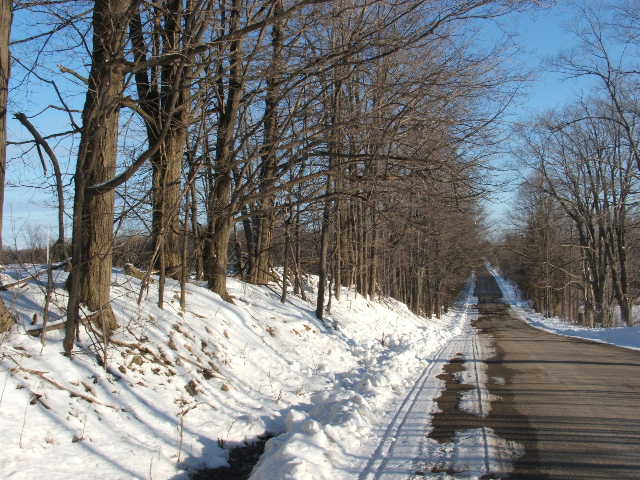
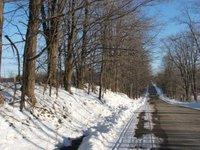


Ruth took a shot of a road up in the counrty and I love the way the distance disappears into infinity. She was trying to capture the trees as her subject and placed them off to the side to get part of the road as well. The lines draw your eyes into the photo and I like how the snow contrasts the grey portions of the road.


Susan got a great photo of this lizard in his cage. The colours are amazing, great contrast of the red-oranges with the greens and the way the leaves on the left are slightly blurred to frame the photo. The lizard is stuck off centered and this picture works great blown up very large.
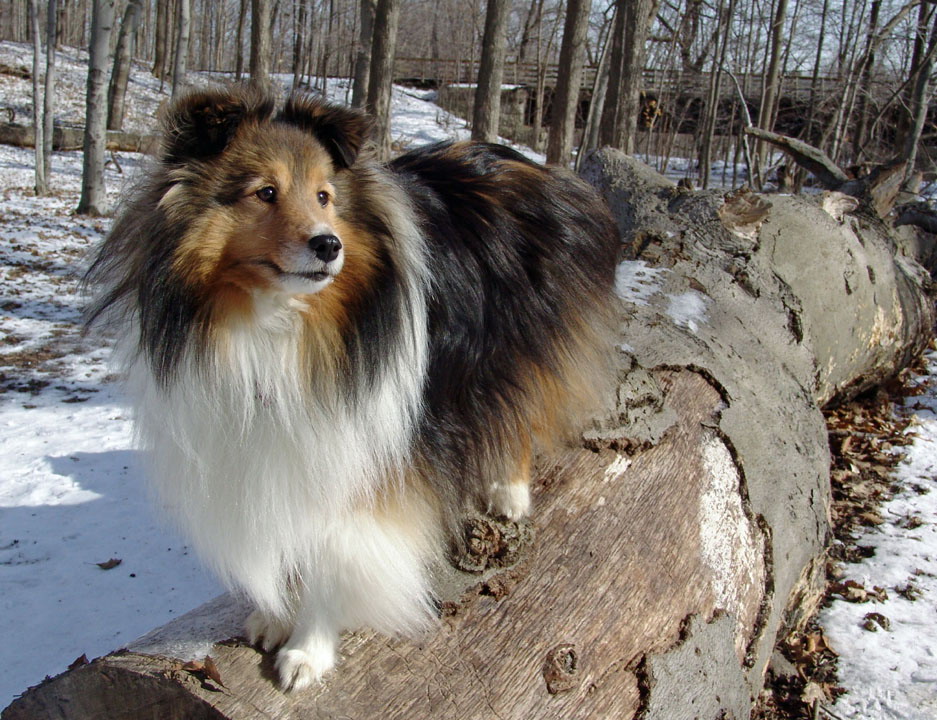
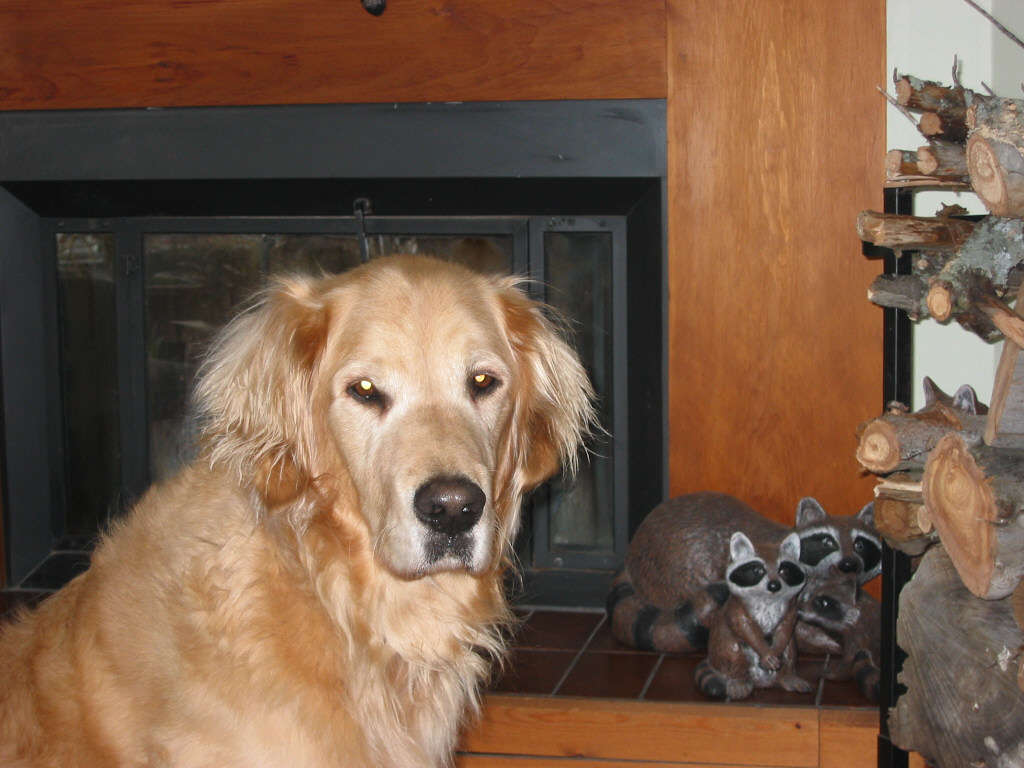


Neil missed the previous class and called on me to help him the best I could outside of the classroom. With this shot of his dog, he made sure to line him off center so he is not just stuck in the bullseye of the camera lens. I would ask him to crop the firewood out and try to put a filter on the eyes so the reflection of the flash wont be so intimidating on the viewer.


Amy and Barb missed this weeks class due to the weather and Jack will have his photos in this week (hopefuly) as he was having computer issues.

Monday, February 20, 2006

The Milton Photo Class

THE MILTON DIGITAL PHOTOGRAPHY CLASS WINTER 2006
Eight exciting weeks of digital fun, folies and learning.
This blog is a collection of photos from the town of Milton’s Digital photography workshop. The purpose of this blog is to show how our members are progressing with their photography skills as they learn step by step over an eight week course on how to take better pictures. Everyone who is taking the class is at a different level and is here to help improve their picture taking in a fun, social environment.
MEET THE CLASS
Bob

Bob has a HP Photosmart 945 at 5.3MP. Bob is here to learn new photo techniques and to take himself from just picture taking to doing photography.
Marshall
Marshall is lucky to have a Nikon Digital SLR. He hopes to get knowledge with the operation of his digital camera.

Barbra
Barb has a Kodak Easyshare C340. Barb writes that she is a beginner. She can put in batteries, knows where the card is, can take a picture but she doesn’t know the meaning of all the symbols on her camera. She wants to learn how to work her camera, what the symbols mean and says it would be nice to learn how to capture good images. She say she doesn’t want me as a teacher to hesitate to go back to the bare basics in the class.

Judy
Judy is using a Canon Powershot A75. She expects to use her camera in its full capacity and to use it more efficiently and to stop cutting off objects.

Susan
Susan has a Nikon SLR and would like to understand the features on her camera.

Michelle
Michelle has a Sony Cybershot at 3.2 mp. She wants to learn about the special features on her camera, wants to take better landscape shots and wants to learn how to take better pictures through windows.
Neil
Neil has a Canon Powershot S30 and admits he is very computer challenged. We hope by the end of the class Neil will be admitting he is not computer challenged and will learn to love working with both his computer and his camera.
Neil P.
Neil has a Sony Cybershot with 4.1 mp. He is a new owner of a digital camera and wants to understand the operations and features of the camera.
Mike
Mike has a Fuji Finepix 2600 with 2 mp. His goal is to learn new photography tricks, especially nighttime or dark lighting shots. He admits his camera has 100 iso only and says “Its poor for dark shots.”

Kate
Kate has a Kodak Easyshare CD 33 at 3 mp. She wants to improve on her photo techniques and to get more knowledge on photography.
Amy
Amy is using a Concord Duo 2000 at 2 mp. She says she has never used a digital camera and she needs to know how to use one to take great pictures.
Jack
Jack has a Fuji F10 and is looking to develop general expertise in the use of his camera.

John
John has a Sony F828 with 8 mp. He wants to learn to take better digital pictures and to learn how to do photo editing.

Alice
Alice has a Cannon Powershot S215 with 5 mp. She received her camera as a gift in July and she has taken over 11000 photos. She would like to learn how to use more functions on her camera beyond auto-focus and to edit her photos as well as combining photos into documents.
Ruth
Ruth has a Fuji S3100 at 4 mp. She hopes to gain confidence with the camera settings and saving on her computer including filing and emailing cropping and so on. In other words, Ruth says she needs to learn it all.

The final member of the class is me, teacher AnnK.
AnnK uses a Fuji Finepix F610 with 12 mp. From this class I hope to help people with their problems while keeping each weekly session as fun and as interesting as best as I can. With my background and knowledge, I hope to share the tips, tricks, and hints I have accumulated over the years of being a photographer and to help everyone to be more comfortable using their cameras, no matter what their level might be.